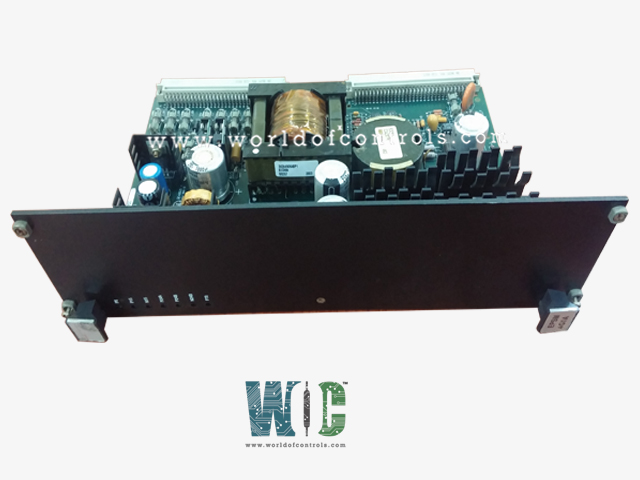
World Of Controls understands the criticality of your requirement and works towards reducing the lead time as much as possible.
IS200EPSMG1A - Exciter Power Supply Module is available in stock which ships the same day.
IS200EPSMG1A - Exciter Power Supply Module comes in UNUSED as well as REBUILT condition.
To avail our best deals for IS200EPSMG1A - Exciter Power Supply Module, contact us and we will get back to you within 24 hours.
Part Number: IS200EPSMG1A
Manufacturer: General Electric
Country of Manufacture: United States(USA)
Series: EX2100
Manual: GEI-100462
Repair: 3-5 Days
Function: Exciter Power Supply Module
IS200EPSMG1A is an Exciter Power Supply Module developed by GE. It is a part of EX2100 turbine Control System. The EX2100 Excitation Control System and the EX2100 Regulator Control both use this Exciter Power Supply Module (EPSM). EPSM Group 1 (EPSMG1) modules are used in the excitation control system, while EPSM Group 2 (EPSMG2) modules are used in the regulator control. The Exciter Regulator Power Supply Daughter board (EPSD) is mounted to the EPSMG2. The EPSM is made up of two major parts: a buck-regulator and a push-pull inverter. The buck-regulator converts the input voltage to an intermediate voltage of 50 V dc. This intermediate voltage is then fed into a push-pull inverter, which generates the necessary multiple output voltages. The push-pull inverter's transformer provides high-voltage isolation between the input voltage source and the output supplied to the control system.
EPSMG1 converts 125 V dc from the power distribution module (PDM) to the voltages needed for EX2100 excitation control. Each of the controllers M1, M2, and C is powered by three independent EPSMG1s. They have installed in the control cabinet's EPBPG, A Exciter Power Backplane (EPBP), which is located beneath the EBKPG A Exciter Backplane (EBKP). Power is transferred from the EPSMG1 to the EPBP via connectors P1 and P2 for cables to the EBKP and other boards. The EPSMG1 provides power to the control assembly backplane at +5 V dc, 15 V dc, and 24 V dc. External modules are also powered as follows:
EPSMG2 converts the dc link bus voltage into the voltages needed to control the EX2100 regulator. One EPSMG2 is installed in the ERBPH A Exciter Regulator Backplane in simplex systems (ERBP). In redundant systems, one EPSMG2 is installed in the ERBP (M1) and another in the ERRBH A Exciter Regulator Redundant Backplane (ERRB, M2/C). By increasing the creep and clearance, the EPSD mounted on EPSMG2 modifies the power input path, allowing EPSMG2 to accept higher voltages. It also acts as a fuse between the power source for the regulator (dc link) and the buck-regulator. The EPSMG2 provides the ERBP and ERRB with +5 V dc, 15 V dc, and 24 V dc. External modules are also powered as follows:
It is possible to replace a failed EPSMG1 while the exciter is running in a redundant excitation control system. You can leave the failed EPSMG1 in place and run the exciter on the remaining EPSMG1s. However, if a second failure in another control section occurs, the exciter will shut down. If you want to change the EPSMG1, follow the steps below. To replace the EPSMG1 in an online redundant control system.
WOC has the largest stock of Speedtronic EX2100 control spares. WOC is happy to assist you with any of your automation requirements. Please contact our staff by phone or email for pricing and availability on any parts and repairs.
What is IS200EPSMG1A?
IS200EPSMG1A is an Exciter Power Supply Module developed by GE under Mark VI turbine Control System.
What are the main components of the EPSM?
The EPSM comprises two major sections: a buck-regulator and a push-pull inverter. These sections work together to regulate input voltage and generate multiple output voltages as required.
What is the function of the buck-regulator?
The buck-regulator is responsible for converting the input voltage to a 50 V dc intermediate voltage. This intermediate voltage serves as a crucial step in the power conversion process within the EPSM.
How does the push-pull inverter contribute to the EPSM's functionality?
The push-pull inverter utilizes the intermediate voltage generated by the buck-regulator to produce the required multiple output voltages. It operates in tandem with the buck-regulator to ensure stable and reliable power delivery to the control system.
What role does the transformer play in the push-pull inverter?
The transformer employed in the push-pull inverter serves to provide high-voltage isolation between the input voltage source and the output supplied to the control system. This isolation ensures safety and prevents potential damage to the control system components.