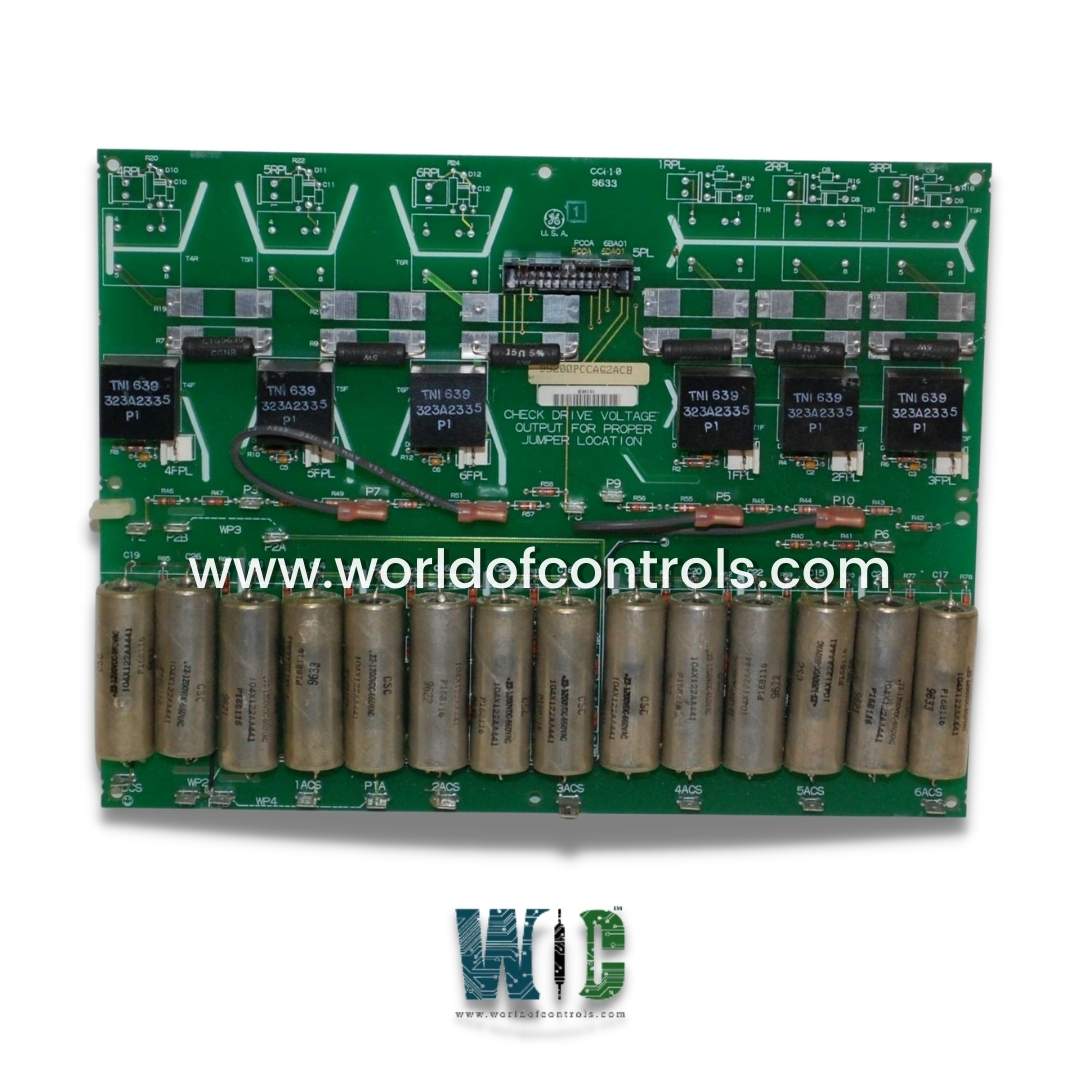
DS200PCCAG2A - DC Power Connect Board

DS200PCCAG2A - DC Power Connect Board DS200PCCAG2A - DC Power Connect Board

World Of Controls understands the criticality of your requirement and works towards reducing the lead time as much as possible.

DS200PCCAG2A - DC Power Connect Board is available in stock which ships the same day.

DS200PCCAG2A - DC Power Connect Board comes in UNUSED as well as REBUILT condition.

To avail our best deals for DS200PCCAG2A - DC Power Connect Board, contact us and we will get back to you within 24 hours.

SPECIFICATIONS

Part Number: DS200PCCAG2A
Manufacturer: General Electric
Series: EX2000
Product Type: PCB
Function: DC Power Connect Card
Power Requirements: +5 V dc, 6 A
Number of relay channels: 12
Power supply voltage: 28 V dc
Technology: Surface mount
Operating temperature: -30 to +65 degrees Celsius
Size: 15.9 cm high x 17.8 cm width
Repair: 3-7 Day
Availability: In Stock
Country of Manufacturer: United States (USA)
Manual: GEI-100161B

Functional Description

DS200PCCAG2A is a DC power connect board developed by GE under EX2000. It connects the control circuitry of the drive to the SCR power bridge. It drives the SCR bridge with pulse transformers. The component includes snubber circuits to control spikes across the ac lines, dc bus, and gate drivers for low-to-medium horsepower controllers. Some or all of the snubber circuits are omitted from the board and are located elsewhere in the system for higher horsepower controllers. The board is divided into ten groups. The system voltage, frame size, and whether the system uses regenerative or non-regenerative power conversion all influence the group number used in a system. It has 12 plug connectors for sending forward and reverse gate pulse signals to the SCR bridge. Connectors are 1RPL-6RPL and 1FPL-6FPL. It also has an extra plug connector, 5PL, that allows it to communicate with the power supply board. WOC team of specialists can repair this board for you. If you need a repair quote, please contact us by phone or email.

DS200PCCAG2A Features

The board offers several notable features that contribute to its functionality and usability. Here is an expanded description of these features:

  • Jumper Configurability: The board incorporates jumpers that allow for configuration and customization. These jumpers can be adjusted or connected in specific ways to modify the board's settings, such as configuring the armature voltage range and snubber capacitors. By selecting the appropriate jumper positions, users can tailor the board's behavior to meet their specific requirements or system specifications.
  • Wiring Connectors: The board is equipped with wiring connectors that facilitate the sending and receiving of signals from the drive. These connectors provide a secure and organized means of establishing electrical connections between the board and the drive, ensuring reliable signal transmission. They enable seamless integration and communication between the board and other components within the system.
  • Dedicated Location in Board Cabinet: The drive has a dedicated location within the board cabinet where the board is intended to be installed. Prior to installing the board, it is necessary to remove two other boards from the cabinet. This designated location ensures proper alignment and placement of the board, optimizing its functionality and ease of access for installation, maintenance, and troubleshooting purposes.
  • Communication with Power Supply Board: The board communicates with the power supply board via an additional plug connector labeled as 5PL. This communication interface allows for the exchange of data, control signals, and power between the board and the power supply board. It enables coordinated operation and synchronization between the two boards, ensuring reliable and efficient power delivery to the system.
  • Gate Pulse Signal Transmission: The board facilitates the transmission of forward and reverse gate pulse signals to the SCR (Silicon-Controlled Rectifier) bridge. This is achieved through twelve plug connectors labeled as 1RPL, 6RPL, 1FPL, and 6FPL. These connectors establish the necessary connections for transmitting the gate pulse signals, which are crucial for controlling the switching of the SCR bridge and regulating the power flow within the system.

Configurable Jumpers

  • JP1 and JP2: These jumpers are located on the board and are used to establish connections between stab terminals P3 through P10. The specific configuration of JP1 and JP2 is determined by the card group number and system voltage. By correctly connecting these jumpers to the respective stab terminals, the board aligns with the designated settings for optimal operation within the system.
  • WP3 and WP4: These jumpers are utilized to connect stab terminals P2A and P2B, and P1A and P1B, respectively. The purpose of these jumpers is to determine the connection of the snubber capacitors to the power bridge point, relative to the voltage feedback channel. The configuration of WP3 and WP4 jumpers dictates whether the snubber capacitors are connected to the same power bridge point as the voltage feedback channel or if they are isolated from it.
  • The proper configuration of these jumpers is essential to ensure the desired functionality and performance of the board within the system. By selecting the correct connections using the jumpers, users can align the board's behavior with the specific requirements of their application. This configurability allows for customization and optimization of the board's operation to suit different system configurations and voltage levels.
  • It is important to consult the manufacturer's documentation, such as product manuals or user guides, for detailed instructions on the specific configurations of JP1, JP2, WP3, and WP4 jumpers. These documents will provide the necessary guidelines, diagrams, and explanations to correctly set up the jumpers based on the intended system voltage, card group number, and snubber capacitor connection requirements.

Board Groups

  • There are ten group numbers on the board. System voltage, frame size, and whether regenerative or non-regenerative power conversion is done all affect the group number that is employed in a system.
  • According to the card group number and system voltage, jumpers JP1 and JP2 must be connected to the proper stab terminals P3 through P10. Stabbing terminals P1A and P1B are connected using jumpers WP3 and WP4, respectively.
  • These jumpers are used to determine if the voltage feedback channel and the snubber capacitors are connected to the same location on the power bridge.

Board Connectors

  • The component connects with the power supply board via one more plug connector, 5PL, and delivers forward and reverse gate pulse signals to the SCR bridge via twelve plug connectors, 1RPL through 6RPL and 1FPL through 6FPL.

Replacement Procedure

  1. Turn off the drive and wait several minutes for all of the capacitors to discharge. Before touching any electrical circuits, make sure the power is turned off.
  2. Open the cabinet door on the equipment to gain access to the printed wiring boards.
    • This reveals the drive control card, which is visible from the front (in the front board carrier).
    • It is mounted behind the drive control on the back of the board carrier (the power supply board is mounted on the front).
  3. Lift the front board carrier (with the drive control card) and tilt it forward and down by pulling the lock tabs on either side of the board rack.
  4. To access the board, lift the second board carrier (with the power supply board) and tilt it forward and down.
  5. Disconnect all cables from the module with care as follows:
    • For ribbon cables, grasp each side of the cable connector that mates with the board connector and gently pull the cable connector free; for pull tab cables, carefully pull the tab.
  6. Release it from carrier by pushing back on the six plastic snaps (holders).
  7. Check that all jumpers on the new (replacement) board are in the same place as they were on the old board.
    • If a board revision added or removed a configurable component, or if a re-adjustment is required,
  8. Install the new module onto the board carrier in the same orientation as the old one.
    • To secure the board, make sure all six plastic snaps (holders) snap back into place.
  9. Reconnect all cables to the component in the order listed, making sure that they are properly seated at both ends.
  10. Reposition the second board carrier with the new component and power supply board.
  11. Return the front board carrier to its original position, slide the lock tab(s) on the board rack's side back into the locking position, and close the drive cabinet door.

Data Exchange Network

  • Each Q core in a TMR control panel reads inputs from the driven device independently. Three independent sensors read a critical input, such as turbine speed. Less critical signals are obtained via a single sensor that is linked to all three processors.
  • The card receives logic signals and acts as a data manager and storage area for all I/O signals. Signals are then routed from the DCC card to the LCCB card and finally to the DENET. Once the data is on the DENET, each processor retrieves all three values and casts a two-out-of-three software vote.
  • Each core performs the voting task on the LCCB card individually.
  • The voted values are saved on the DCC card of each processor and can be used in unit operation. This configuration ensures that for internal calculations on current data, all three cores use the same values. The C core reads information from the DENET and independently votes two out of three times. The DCC card in C receives the DENET pre-vote data from Q. Mismatched votes in any of the cores are detected by the card in C. As a result, a diagnostic warning is issued.

Storage Guidelines

  • Proper storage of the exciter unit is crucial to prevent corrosion and deterioration, ensuring its optimal performance when eventually installed. To safeguard the equipment, customers are advised to adhere to specific guidelines within a clean, controlled environment that is shielded from adverse conditions. Here's a detailed expansion on the provided instructions:
  • Environment Preparation: To uphold the exciter's integrity during storage, it's imperative to maintain a clean, dry, and well-controlled storage environment. This involves the avoidance of temperature fluctuations, high humidity levels, and the accumulation of dust.
  • Protection Measures: To shield the exciter unit from potential damage, it's recommended to provide adequate protection in the form of appropriate coverings. However, it's crucial to use breathable materials like canvas for this purpose and steer clear of using plastic coverings. The objective is to safeguard the equipment without trapping moisture, which can lead to corrosion and deterioration over time.
  • Unpacking and Labeling: Upon storing the equipment, it's advisable to unpack it and apply proper labeling. This step ensures clarity and easy identification when the equipment is eventually retrieved for use.
  • Storage Conditions: The storage enclosure for the exciter should adhere to specific conditions to prevent adverse effects. These conditions include:
  • Ambient Temperature Range: The exciter should be stored in an environment where the temperature remains within the range of -4 to 131 degrees Fahrenheit (-20 to 55 degrees Celsius). This helps prevent extreme temperature variations that could potentially damage sensitive components.
  • Dust and Corrosion Control: The storage area should be kept free from dust and corrosive elements such as salt spray or chemically and electrically conductive contaminants. Such particles can lead to erosion and chemical reactions that compromise the equipment's performance.
  • Relative Humidity Range: The recommended relative humidity range for storage is between 5% and 95%. Additionally, provisions should be made to prevent condensation from occurring, as excessive moisture can contribute to corrosion and damage. Using humidity control measures, such as dehumidifiers, can help maintain the desired humidity levels.
  • Rodent Prevention: To avoid potential damage caused by rodents, it's essential to ensure that the storage area is free from these creatures. Rodents can chew on wires and insulation, causing significant harm to the equipment.
  • Moisture Condensation: Temperature swings can lead to moisture condensation on the equipment's surfaces. To mitigate this, it's important to prevent abrupt temperature changes within the storage environment, which could result in the formation of moisture and subsequently lead to corrosion.

WOC is happy to assist you with any of your GE requirements. Please contact us by phone or email for pricing and availability on any parts and repairs.

FREQUENTLY ASKED QUESTIONS

What is DS200PCCAG2A?
It is a DC power connect board developed by GE

What is the purpose of JP1 and JP2 jumpers on the PCCA board?
Jumpers JP1 and JP2 on the PCCA board are used to connect the board to the correct stab terminals (P3 through P10) based on the card group number and system voltage.

What is the purpose of WP3 and WP4 jumpers?
It is used to connect stab terminals P2A and P2B, and P1A and P1B, respectively. These jumpers determine whether snubber capacitors are connected to the same power bridge point as the voltage feedback channel.

What are the configurable components of the board?
The armature voltage range and snubber capacitors can be configured using the jumpers and wiring connectors on the board.

Are there any LED indicators, fuses, test points, or switches?
No, there are no LED indicators, fuses, test points, or switches on the board.

How does the board communicate with the power supply board?
It communicates with the power supply board via one additional plug connector, 5PL.